


When we think of having a beautiful home we think of its interior design, furnishings, and decorations, light fixtures, cabinetry, etc. Have you personally ever taken a moment to renovate or take interest in the structure of the house? While you are enjoying your hot chocolate by the fireplace, have you ever noticed and felt any bulges on the walls? While they can be easily noticed on your bedroom walls, they hardly ever get noticed on the ceiling. Until and unless it starts dripping or there is a big brown mark on the ceiling; you fail to notice water damaged ceiling.
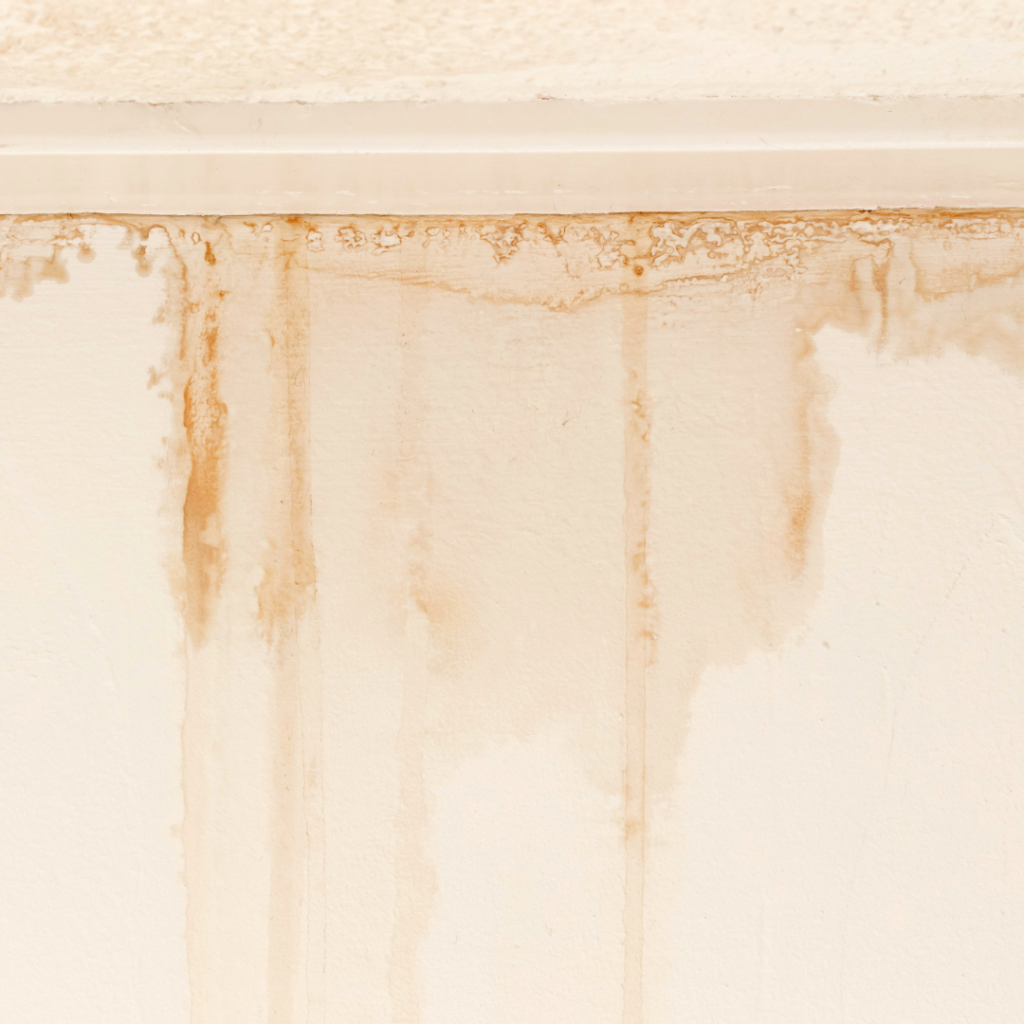
It should be noted that moisture can pass through possibly anything. No matter how much your local contractor guarantees, there is always room for mistakes. If you are planning to renovate your home and its interiors, take a good look at your ceiling first, as it could turn out to be a bigger threat than imagined. It starts with little bubbles on the walls, then bigger bulges, next there is discoloration and suddenly you see a sagging ceiling. It is safe to say that water is leaking into your house and it is a big issue.
Damaged ceilings could lead to major property and furniture loss. If the condition gets worse, it could spread to your woodwork and cabinetry. There is a peculiar stench that gets spread in the entire house due to that. If you have noticed any of the signs mentioned above, then you must contact For Professional Ceiling Installation service provider.
Causes of water damaged ceiling
As alarming as the situation gets, the reasons are multiple. Every repair project is different from the other and in this case, there could be several sources
- Damaged roof- natural calamities and extreme weather conditions, heavy rainfall, etc. could damage your roof. It could be easily figured if the water leakage is due to a faulty roofing system. If you observe water dripping from your ceiling that is slowly getting discolored (almost brown) then it is most probably due to the damaged roofing system. Therefore, it should be inspected right away.
- Plumbing problems- as soon as you spot a damaged, leaky ceiling, pay attention to its exact location. If the ceiling is right beneath a kitchen or a bathroom, then you must get the plumbing fixtures of that room immediately. The chances are that the leak is due to a faulty faucet or drain, shower, toilet, or sink, etc. Also, it is possible that your plumbing system is old or corroded and becoming the source of the damaged ceiling.
The reasons could be many but it is advised that you must not take the situation into your hands unless you have the experience. Do not fidget with the plumbing system or climb the roof on your own as it is risky since the roof could be slippery and wet. To get to the reason behind the damage, it is better to get inspected by an expert.
What to do if you notice a leaky ceiling?
As soon as you notice a damaged ceiling, you must not waste a single minute.
- First things first, remove everything around and below the damaged ceiling. Move all your belongings to dry places and try to use paper towels or buckets for a quick fix until you call a professional. Make an arrangement with the professional as soon as possible.
- After you are done sorting and removing your belongings make sure you assess the ceiling and the damage. Inspect the area thoroughly, and try to spot the damaged areas and if it has spread to other areas.
- Prep the area before repair. Make sure you have handled the situation correctly. Before you get the problem fixed, spread some newspaper over the floor. Remove your belongings around the repair area and get rid of everything moist and in liquid form.
Steps to repair a water damaged plaster ceiling
- Start by cleaning the ceiling. Make sure that your ceiling is completely dry and smooth before the repair work starts. Remove the(water-damaged) chipped paint and plaster with the help of a putty knife.
- Once the ceiling is clean, you might notice some crevices and cracks. Make sure you fill the holes and cracks. Leave it to rest so that it dries up.
- Once it has dried up entirely, and the ceiling area to eliminate all kinds of bumps and holes. Make sure you have your safety goggles on.
- Once the ceiling is more than dry apply a coat of primer.
- Touch up with fresh paint. Make sure the primer has tried and only then start painting it with waterproof paint.
Steps to repair a water damaged drywall ceiling
- Begin the process by cleaning the area. Make sure you clean the damaged bits around the area.
- Next, using a drywall saw, cut out the damaged plaster.
- Get the plywood strips ready and cut them according to the accurate measurement.
- Make sure you measure the hole carefully and install the new plasterboard. Seal it with screws onto the wood.
- Mix some mud (joined compound) and apply it to the area with a putty knife. Cover it with mesh tape. Make sure to smooth it out. Let it dry
- Sand the area to smooth out the area and follow with a fresh coat of paint.
As simple as it looks, you would be needing the assistance and guidance of professionals.
The repair cost of water damaged ceiling
The cost of the repair project depends on various factors
- The intensity of the damage. Damaged ceilings that are spotted at an early stage can be fixed in a few hours and won’t cost you much. On the other hand, there is heavy damage the cost is likely to increase
- Time taken to complete the repair project
- The hardware and its quality used for the project.
All in all, a water damaged ceiling could be a serious threat to your property and house. Although the steps are not too tricky it would be best if you get assisted by the best handyman in NY.
0 Comments.