


Select the right bunch of tools and be a little organized when undertaking an IKEA DIY assembly project. It is not necessary to only use tools that come along with the furniture you buy. You can supplement them with better and more efficient tools. Like any other interior designing project, first imagine the space in your mind and then note down the theme and effect you are looking for on paper. Have a look at five useful tips that can help take off the stress.
1. An electric screwdriver with replaceable bits
Although the kit from IKEA will include a manual screwdriver, an electric one will save time and effort. An electric screwdriver is a onetime investment; it can be used not just for furniture, but for various other small jobs at home. It comes with bits of various sizes. These bits go very easily with a power drill, without causing any damage to the board. The electric screwdriver will come very handy when you will need to mount your furniture onto the wall.
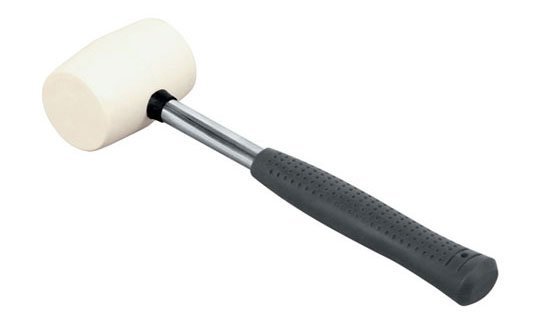
2. A rubber mallet is better than a conventional hammer
Most furniture from IKEA needs to be assembled by joining two wood dowels together. A rubber mallet will empower you, more force than a conventional hammer. A metal hammer can damage the custom designed holes in the board. A rubber mallet distributes force more evenly and is successful in keeping the wood planks together. Another helpful tip that will add finesse to the job is to always go for a white mallet. If you still get stuck call a furniture assembly service nyc.
3. Be organized and count your pieces first
Before you start assembling the pieces, first organize yourself. Keep all the pieces according to the order and the screws alongside with it. The instructions from IKEA are always with images, so separate them in order before you create confusion for yourself. A reputed furniture assembly service in nyc, will be able to give you some tips over the phone too.
4. Add your personal touch before assembly
If you are looking to do add your personal touch to the designing, then do that before assembly. Any paint job or drilling of holes should be done before you actually join the pieces together. Plan your customization beforehand to avoid any disruptions at the last minute.
5. Remove all unwanted items from the room
Assembling furniture requires space and freedom of movement. Give yourself space to keep all items spread and clearly visible. It is a good idea to remove some furniture from the room. You can also check out IKEA based sites to handle the whole process of design more efficiently. The important thing to remember is that you should work in a comfortable position and not be forced to be uncomfortable due to lack of space.
0 Comments.