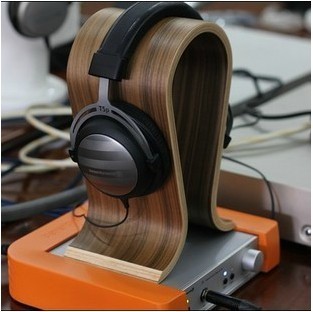
Where do you keep your headphones when you don’t need them? Do you litter them around on your bed, work table, closet and sometimes even on the floor?
If that’s how you keep your adored headphones, they won’t last as long as you expect them to.
However, if you have a special wooden holder for your headphones, they will stay safe and let you enjoy music for a longer time.

You can make a headphone holder on your own, here’s a step-by-step guide on how to craft your own wooden headphone holder:
Things You Need
- A large log or fire piece (walnut)
- Band saw/ table saw
- Hand file
- Random orbital sander
- Laser etcher
- Jointer
- Planer
- Router
- Finishing oil (Danish oil)
Step 1:
Begin by sketching the shape for the holder. Mark an outline for the crest of the headphones. Use band saw for shaping up the sketch and cut out a rough draft.
Step 2:
When the log piece gives an impression of the sketched shape; use a belt sander to smoothen out the rough edges.
After completing with the crest, move towards the pockmarks where the padded speakers will rest.
Step 3:
Like step 1 and 2, sketch out a rough shape for indentation and cut it using a band saw. Now make the sliced area smoother with sander.
In case, the log piece is too thick, it will demand more time and effort. For that reason, it’s better to split the log into two and then work on each for separate holders.
Step 4:
By now, the wooden headphone holder should look complete, except the lower section.
Remove the foot end of the log using a table saw and ensure that you have a leveled bottom. However, the removed bottom can be used as molding on which the holder will rest.
Step 5:
To screw these two sections together, route the edge of the top section.
However, if you don’t need this molding section thing, skip the step and move on to the next step.
Step 6:
Before completion, beautify the wooden headphone holder with a small design between the crest and indentations. Make sure that the design fits perfectly well in the space available.
Now laser the chosen design to the selected area and conclude it with assembling of the two sections.
Step 7
Although, the headphone holder will look nearly complete by now, it still needs some a little more finishing.
Use random orbital sander top to smoothen the wooden holder and then finish it with a coat of Danish oil. The finishing oil will bring the grain out of the wood and give it natural elegance.


0 Comments.