


 Ceramic tiles are extremely durable and require very little maintenance. However, accidents happen and sometimes tiles get damaged due to heavy items being dropped on them. But even then, you have a reason to be glad as replacing a broken or chipped tile is a pretty simple process. All you need to do is to make sure that you do it early such that your floor or wall requires less maintenance and it lasts longer.
Here are some simple steps to replace your broken ceramic tiles at home.
Step I: Remove the tile adhesive along with the tile piece
It is very important to carefully remove the damaged tiles, as there are chances that you might damage the adjoining tiles as well. The best method that can be adopted is by making use of the specialized tools such as the grout. Also make sure that the waterproof membrane that lies beneath the tile does not get damaged during the process.
You can also adopt another alternative of drilling puncture holes into the tile, such that the tile gets broken down and can be removed easily. But ensure that you only drill till the superficial level of the tile and not deep into the wall or floor as there should not be any waterproofing damage during the process.
Once you detach the tile, remove the adhesive or mortar stuck behind the tile. Make sure you install a new tile only when all the previous mortars and adhesives are completely removed from the floor or the wall.
Step II: Protect the Waterproof Membrane
Depending upon the type of membrane used, you should select a method for repairing the rubber and vinyl membranes lying underneath that does not get damaged. This is done in order to avoid water seepage into the floors and walls.
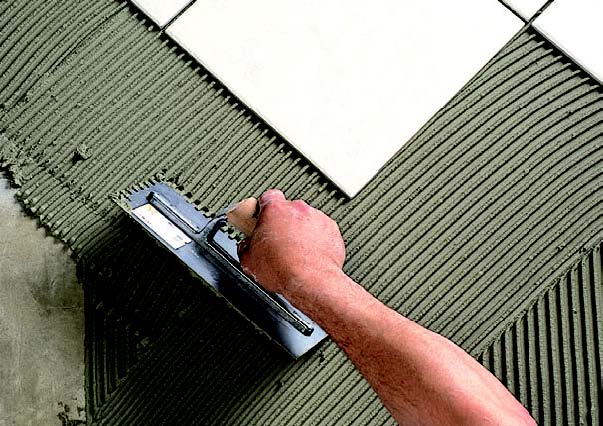
Step III: Use Ceramic tile Adhesive
The next step requires you to apply the ceramic tile adhesive or the tile cement on the gap from where the tile has been removed, by making use of a trowel. You can make use of putty in case you are filling small gaps.
Step IV: Push New tile Onto the Cement Bed
 Once you are through with the cement bed, you can now push a new tile on it. Try applying uniform pressure over the edges of the tile and then level the surface of the new tile with the adjacent tiles.
Step V: Wait for the Adhesive to Dry Up
Wait till the adhesive dries up. Once it is dried, use a wet sponge or a damp cloth to clean up any accumulated adhesive on the surface of the tile. It becomes difficult to clean up the adhesive from the tile’s surface once it has completely dried.
Magnificent site. Lots of helpful info here. I’m sending it to a few pals
ans also sharing in delicious. And obviously, thank you on your sweat!